The ESP32 Relay X8 Board

This 8 channel relay board is equipped with an ESP32 Wroom. It can be programmed with an USB-TTL adapter with the Arduino IDE.
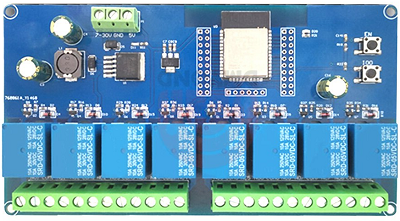
The Board
The microcontroller is an ESP32 Wroom and can be programmed with the Arduino IDE. I use the settings of the "Wemos Lolin32" for the upload.
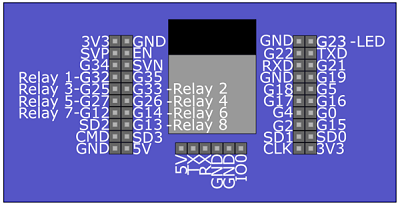
8 relays are connected to GPIOs. The outputs are HIGH active. The relays are connected to GPIO32, GPIO33, GPIO25, GPIO26, GPIO27, GPIO14, GPIO12 and GPIO13. None of the relays will go HIGH on startup. All relays have a red indicator LED. Additionally there is a red LED connected to GPIO 23 (HIGH active). There are push buttons for EN (reset) and GPIO0 (flash).
Most (not all) GPIOs of the ESP32 are available via headers. The double row headers are delivered with the board but you need to solder them. A single side header can be used to get access to RX/TX/IO01 - it will be used to program the ESP32.
The board can be supplied with DC 5V or DC7-28V. A step down converter LM2596S regulates the voltage to 5 V, and an AMS1117-3 is used to generate the 3.3V for the ESP32. The board will draws in idle (with all relays off) 0,17A@ 12V and around 0.43A with all relays on.

The board has cutouts between the relay pins, nevertheless don't use these
relays with mains electrics/230V.
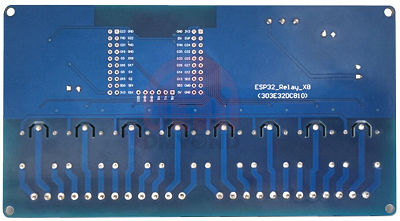
The dimensions of the board are 150 * 80 * 19mm.
The Standard Software of the Relay Board
My ESP32 relay X8 board came programmed with a test sketch. It activates all 8 relays in a sequence from left to right including the additional LED on GPIO23. No Wifi was seen during the demo sketch running.
How to program the Relay Board
The board can be programmed when you connect a USB-TTL to the respective header pins. RX/TX/GND and power are available on the single row header. To bring the ESP32 in flash mode I compile the sketch in the Arduino IDE and wait for the running dots:
esptool.py v3.3
Serial port COM6
Connecting...
Then I do following sequence:
- press and hold EN button
- press and hold flash button
- release the EN button
- release the flash button
After my first upload the ESP32 needed a manual reset.
A simple Demo Sketch
I have put together a generic demo sketch. It is a simple ESP32 webserver to switch the relays on or off. You can download this sketch at the end of this page.
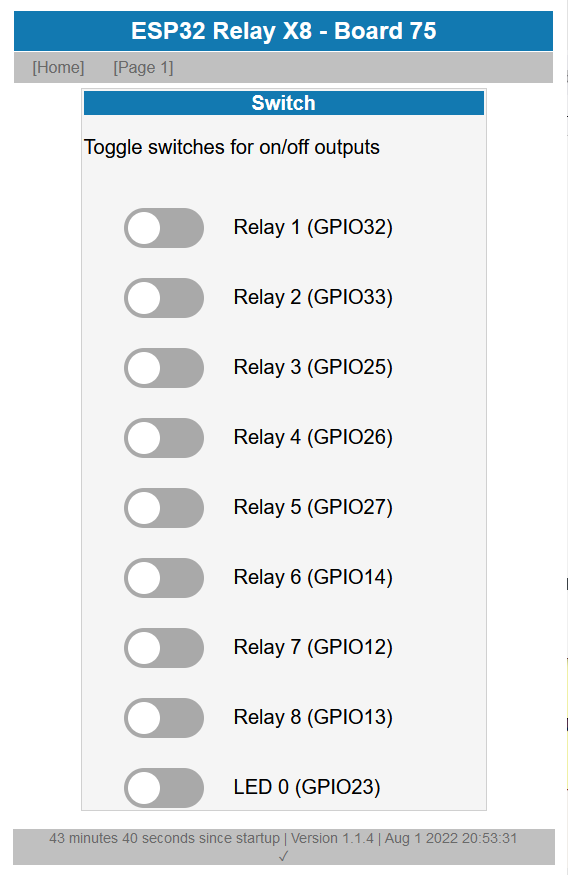
The sketch offers several hardware variants / pin mappings and you must set the respective board in the main tab. The predefined pin mapping for this relay board is 75
#define USE_BOARD 75 // the ESP32 relay X8 board
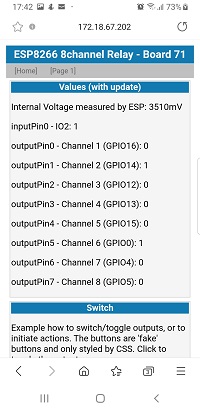
Page 1.htm is just for debugging. It shows the states of all pins and offers simple toggle buttons to switch the relays.
This board doesn't have MOSFETs for PWM outputs, so instead of an array set following precompiler #define:
#define NO_PWMPIN
You could connect a LED to one of the free GPIOs to indicate WiFi activity. If not needed, leave the value for this constant to 255.
const byte wifiActivityPin = ledEspPin; // use ledEspPin or set to 255
Don't forget to either set your WiFi credentials or include your settings in the main tab.
This concludes the configuration of the ESP32 Relay X8 board.
Note: This generic webserver sketch is compatible for ESP8266 and the ESP32, hence the precompiler defines to differentiate the boards based on your upload settings. If you want to read more about the generic ESP webserver sketch - see this page: Simple ESP webserver.
Pricing of the ESP32 Relay X8 Board
This 8 channel relay board is available for approximately 22 EUR including shipping and VAT. It might not be a super cheap offer, but if you need a relay board with an ESP32, a DC/DC converter and don't want to wire three separate boards - I can recommend this board.
Summary for the ESP32 Relay X8 Board

This 8 channel relay board is a compact solution if you just need 8 simple relays driven by an ESP32 and if no relay should be incidentally activated during program start.