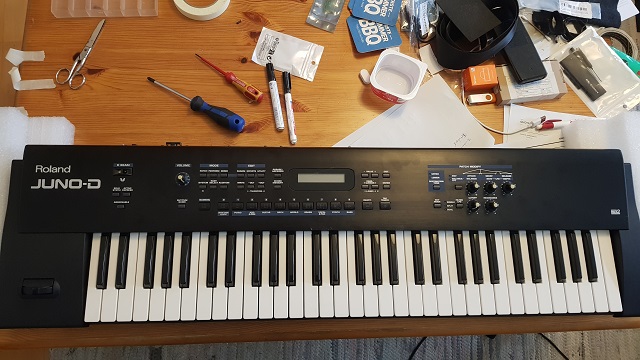
Roland JUNO-D Keybed Repair
Recently I've bought a Roland JUNO-D with a damaged keybed. The previous owner has tried to clean the rubber contacts but during dismanteling he has ripped of a ribbon cable between the keybed and the mainboard. As there is a video on Youtube with such a repair and even an older forum post wherein one asks for something similar, I would like to share what I have done with that JUNO-D
What happend?
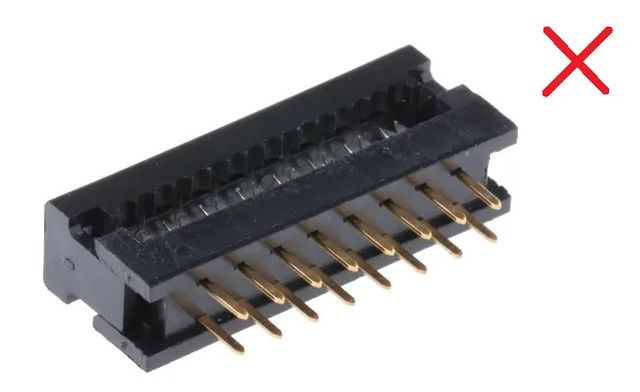
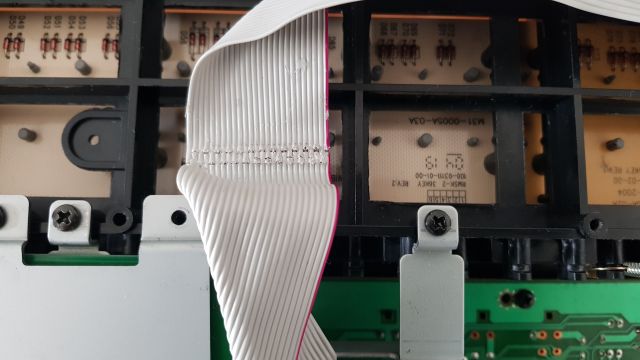
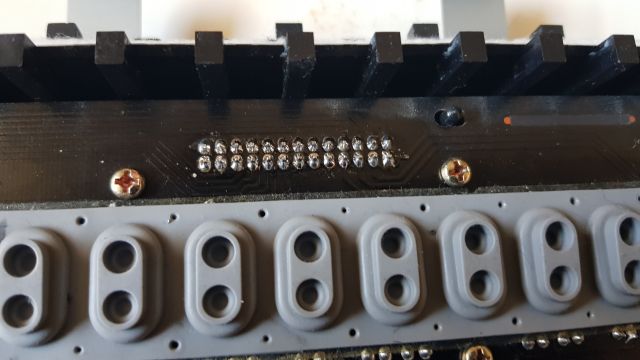
The Roland JUNO-D has a MSK-1 keyboard. This keybed consists of two PCBs. The connection between these PCBs and the main board is done with a 26pin ribbon cable. The root cause was, that on the larger keybed PCB (03786345 PWB keyboard low assy) the ribbon cable male connector is SOLDERED to the PCB. It is not intended for disconnection. The previous owner has ripped of the cable mount of that IDC connector.
See this example: This kind of male PCB connector is not intended for later disconnection when soldered to a PCB!
How do you repair the ribbon cable in a Roland JUNO-D?
The original OEM ribbon cable has 26pins, pitch 2.54 and is approx. 45cm long. I found a slightly longer ribbon cable with 50cm with two sockets and decided to add a third female connector at the proper space instead of the PCB connector and to solder a IDC male connector for through hole mount on the keybed PCB. This will make later maintenance easier as the ribbon cable can now be disconnected from the keybed PCBs and you are not forced to dismantle the main PCB to disconnect the cable.
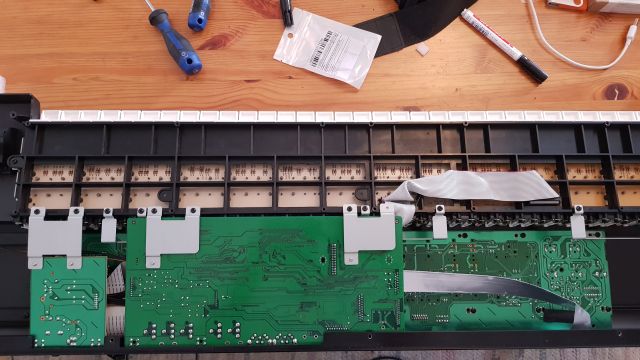
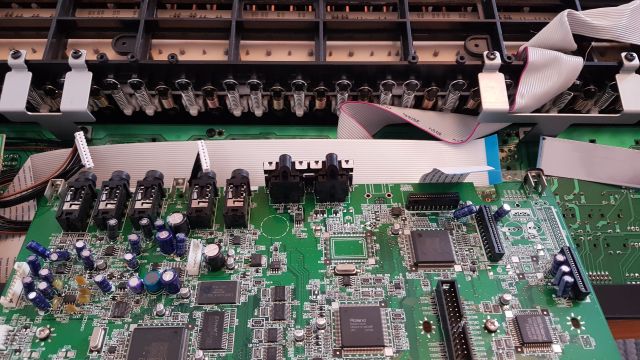
Digging down in the Roland JUNO-D
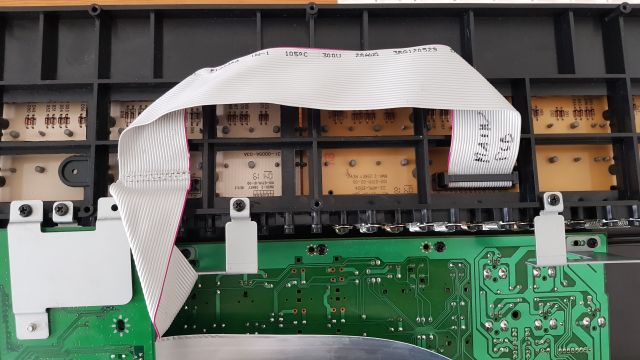
The cable on the (larger) keybed PCB was some kind of reconnected - but
turned by 180 degrees
The correct orientation would have been with pin 1 (red marked) facing
together
In this case there was no chance to save the ribbon cable because it was
damaged on several other locations:
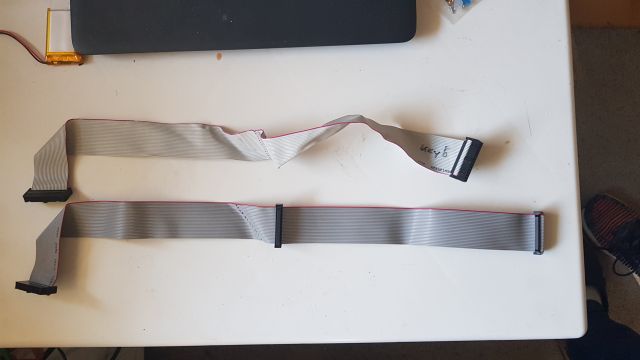
Now let's make a new ribbon cable based on the old one. The female connector
on the ribbon cable must be orientated in the same way like on the ends. The
connectors have a notch on one side: all notches must be orientated in the same
way, the "red" wire should be pin 1:
Next step is to desolder the IDC connector from the keybed PCB. I have used a desolder
pump to remove the damaged connector and cleaned the holes with solder wick and isopropanol alcohol (IPA):
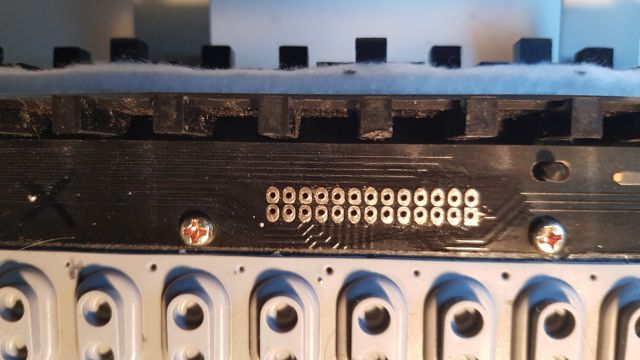
The print on the PCB shows the correct orientation for the socket. The notch
needs to be 180 degrees rotated compared to the other PCB which is correct -
remember also the red marked wire faced inwards:

The installed IDC male connector:
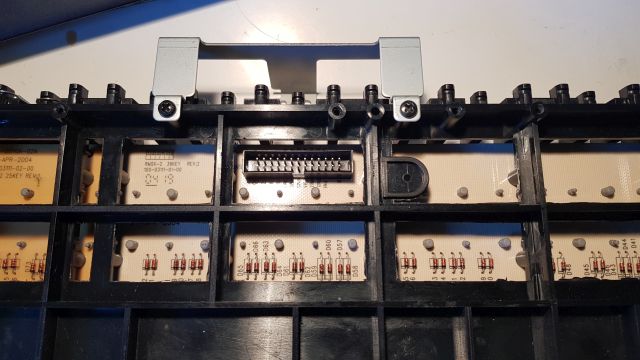
After soldering the IDC male connector
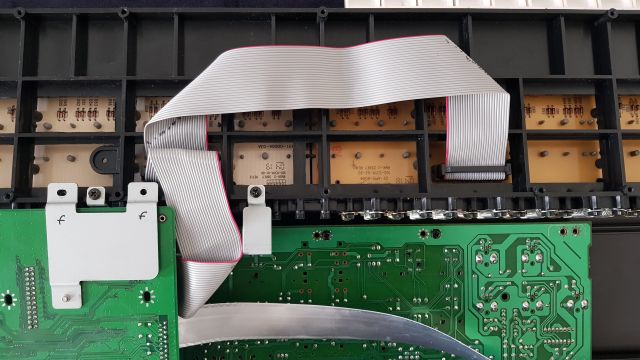
Finally the new ribbon cable can be installed:
Key Check in Test Mode
The Roland Juno-D has a keyboard check in the test mode. Hold down the three buttons [Destination Tone] [ENV] [TAP] and turn on the JUNO-D. Press button [SHIFT]+[PAGE/CURSOR] to navigate to Menu 12 to test all keys:
KEYBOARD Test:
                PIANO
[ENTER] will proceed to the next test.
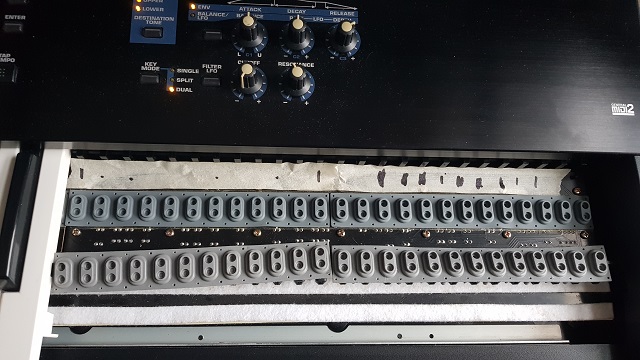
Usual Keybed Repair: Cleaning and Replacing the Rubber Contacts
Some rubber contacts had heavy wear. It might be that one has tried to use some kind of graphite to "improve" the keys. I have cleaned the rubbers with soapy water and isopropanol (IPA), cleaned the contacts, but still two octaves where not working properly and I have ordered replacement rubber contacts. Unfortunately the rubbers of that MSK-1 keybed are not cheap (roughly 35 EUR for the two octaves), but at least you can source them within the EU.
A picture with the new rubbers installed (the old ones as reference):
Other Keybed Repairs: Cleaning of Keys on Keybed
Several keys on the keybed were in rough shape.
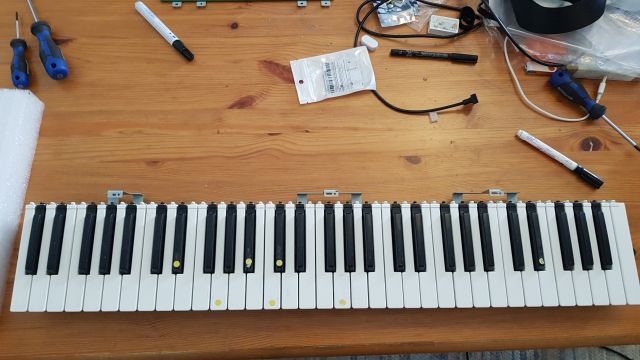
Common cleaning and even IPA wasn't enough. Some keys were sanded with 1000 grit
wet sand paper, machine polished and
now the keybed looks fine again.
Other Repairs: Change of faulty Buttons
The button for [VALUE-] was faulty therefore I decided to replace that button.
As you need to tear down the synthesizer to get to that "03784934 Panel R Board Assy", I have replaced several other
buttons
also were I assume they might fail in near future due to identical wear:
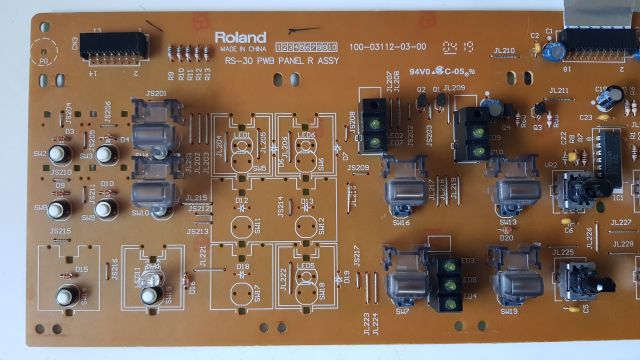
I have ordered replacement buttons before checking my PCB relying on pictures in the internet. In reality my PCB was equipped with 2 pin black 6x6x5mm buttons not these round ones with white cap. Now you know it - do it better ;-).
Was it worth it?
Hell NO! The market price for a pristine Roland JUNO-D is just to low. It's not so much the costs of material but the time it took to make it work again. In total I spent around 10 hours to bring he JUNO-D back to it's current state. Haters say, Roland has just reused the legendary Juno name on that "Rompler" synthesizer. However the modification of some basic saw wave with the potentiometers for the ADSR envelope makes that synthesizer real fun to play. Also the D Beam is something to explore. In the end it was a nice experience to tinker around with gear.