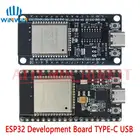
Several Examples with the Webserver for the ESP8266 and ESP32 - maxi
ESP8266 and ESP32 are great microcontrollers with WiFi. Using a webserver to control pins or display sensor data on a webpage comes in mind. On this page I would like to show a quick way how to get a working webserver on an ESP.
The right webserver examples to start using Arduino are:
- on the ESP32 the example Webserver / HelloServer
- on the ESP8266 the example ESP8266Webserver / HelloServer
What you get here
The ZIP file at the end of the page will download an ESP32/ESP8266 compatible webserver. It contains several webserver examples
- How to setup a webserver the first simple page (example 10)
- An extendend webpage to be reused in real world programs (example 20)
- A page to output several variables, for example your sensor data (Example 30)
- A form to transmit user data from the browser to the ESP (example 40)
- A form to switch on/off pins on the ESP (example 50)
- A form to start/stop an action / to trigger a function (example 55)
- How to refresh values on a page using FetchAPI/JavaScript (example 70)
- Activate OTA for easier (and faster) sketch upload
Main Tab
This ESP webserver sketch is compatible for the ESP8266 and the ESP32. Hence there are several precompiler defines to differentiate the boards based on your upload settings. The setup() in the main tab connects to your Wifi, defines which "pages" are available on your server and starts OTA.
In the loop() you just need to call the webserver and OTA. Furthermore you would need to read your sensors, update your variables,...
The Configuration
In the main tab you have to configure your board. Mainly you will need to enter your WiFi SSID and password or link to an include file with these informations.
A simple HTML5 Page (tab server10)
Example 10 shows the principle of HTML generation.
Simple Output of Text, styled with CSS (tab server20)
The server20 contains functions to output the HTML pages, and the CSS. The server can also output plain text (used for 404 page not found) or any other file type you need.
- A page 404 if the user enters a wrong page
- Handle the favicon.ico which is requested by several browsers.
- How to style the page using CSS
Simple Output of Variables (tab server30)
The server30 shows how to display variables on a webpage. This example uses some global variables. The function example30Loop() should be called in your loop() to make the variables change.
Process Input Fields from a Form (tab server40)
The server40 demonstrates how to write a form with several input fields and how to collect data from the user.
Switch Pins with Buttons (tab server50)
The server50 contains buttons so the user can switch on / off pins on the ESP. The example assumes LOW active GPIOs like the LEDs on the ESP8266.
Initiate an Action with Buttons (tab server55)
The server55 shows, how to start actions ESP. The example uses separate functions for each button press.
Update Values on Webpage without Refreshing the whole Page (tab server70)
The server70 is an comprehensive example how to update values on the webpage without the need of refresh/reload of the whole Page. This example uses FetchAPI and JavaScript (but not AJAX). To make that work, you basically need 3 components:
- In the Webpage: Variables get an unique SPAN ID on the page. Furthermore you must include a JavaScript containing the FetchAPI in the HTTP header.
- A JavaScript (j.js): The browser requests new data (the interval is 5000ms) and the server responses with the current data. When the JavasSript (j.js) receives data in JSON format it can do several task: fields from the JSON which share the same name on the page are inserted. Other fields can be calculated and updated also. Furthermore you can change colors of elements. The example will change the color of the field 'sec' to blue when new data will be requested. If the request fails the field will get red. If the request was successful the field will return to it's usual color.
- JSON: To transmit data from the webserver to the browser I suggest to use JSON. JSON data can be parsed very easily with JavaScript. It enables you to add more fields, delete fields or change the order of fields.
The Tab "ota"
The sketch adds OTA (over the air) update capability. OTA is not necessary to operate a webserver. OTA enables you to update your ESP8266 / ESP32 via WIFI without a serial connection.
- Download as ZIP: ESP Webserver Examples (maxi)
- Previous step: ESP8266 ESP32 webserver mini - easier introduction
- The next step: Generic ESP Webserver (switch pins) - a use case
- 8 channel ESP8266 Relayboard available on Aliexpress *) Affiliate Link)
- NodeMCU V2 makerfriendly ESP8266 board on Amazon *)
- ESP32 makerfriendly on Amazon *)
(*) Disclosure: Some of the links above are affiliate links, meaning, at no additional cost to you I will earn a (little) comission if you click through and make a purchase. I only recommend products I own myself and I'm convinced they are useful for other makers.
History
First upload: 2023-07-27 | Version: 2023-11-27