Integrate a self written "RGB Light" into Home Asssistant
In this post you learn how to integrate a self written RGB Light Controller (for example with an Arduino UNO/MEGA or ESP82666 or ESP32) into Home Assistant. Lot of tutorials are using MQTT or ESP Home. On this page I describe how to control RGB Lights with an JSON endpoint.
Pre requisits
Regarding Home Assistant (HA) you will need:
- A running instance of Home Assistant. I'm using a Raspberry Pi5.
- In HA you have to install file File Editor (Install via Settings / Add ons / ADD-ON STORE called "File editor")
- In HA you need to know how to add new entities to your dashboard
Obvious you will need a device
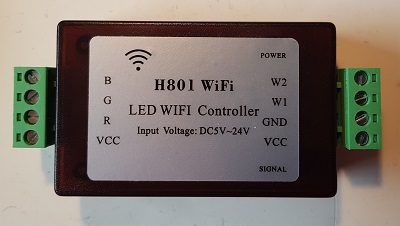
- A microcontroller which can control an RGB strip via HTTP. I'm using a H801 Module which is based on an ESP8266 with up to 5 MOSFET outputs.
- A running webserver on that microcontroller
- This example will be based on my Generic ESP Webserver but any other webserver should be usable
HA: Helpers - Switch - Light
For the RGB LED control you will need following components in HA:
- helpers
- four Input number helpers will be used for the values for red, green, blue and the brightness
- switch
- a RESTful Switch Integration to forward HTTP requests from HA to your RGB Light Controller
- template for lights
- A script to perform actions (change color, modify brightness) on the HA GUI
The TEMPLATE LIGHT will modify the values of the HELPERS and send the
commands to the SWITCH.
The SWITCH will send the data stored in the HELPERS to your device.
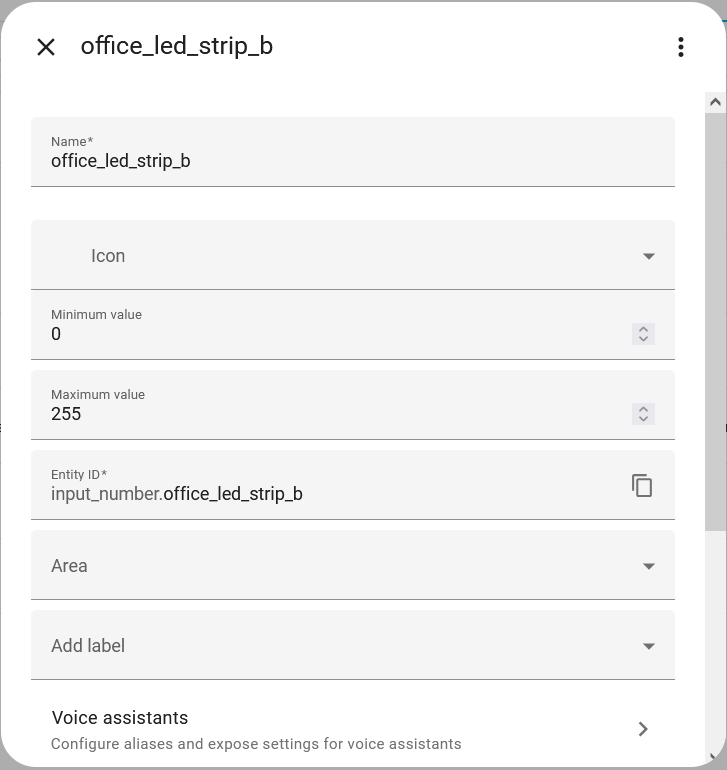
HA: Helpers
In HA go to Settings / Devices & services and chose Helpers. You will need 4 Helpers to store the value for red, green, blue and brightness.
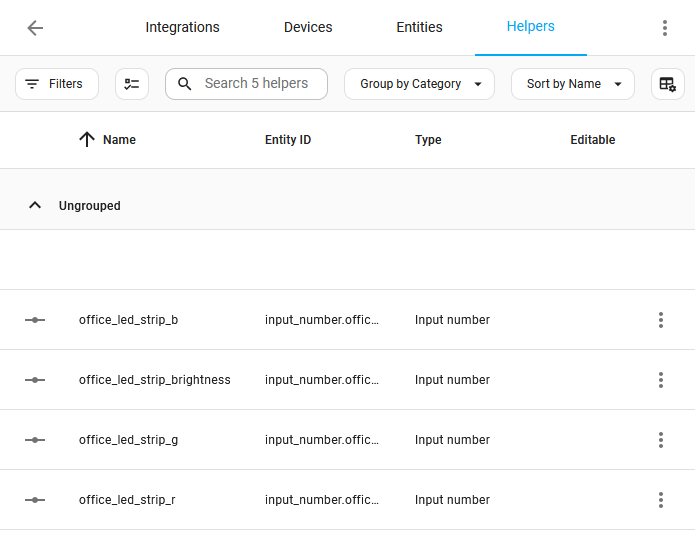
Each helper hold values from 0..255.
HA: The configuration.yaml
You could add your switch integration and the light template directly in your configuration.yaml. I propose to put all integrations in separate file and just include that file in configuration.yaml. In my example the two integrations will be named myswitch.yaml and for the template mytemplate.yaml.
# Loads default set of integrations. Do not remove.
default_config:

# Load frontend themes from the themes folder
frontend:
  themes: !include_dir_merge_named themes

automation: !include automations.yaml
script: !include scripts.yaml
scene: !include scenes.yaml

# My entries
switch: !include myswitch.yaml
template: !include mytemplate.yaml
HA: myswitch.yaml for the RESTful Switch integration
Now create / edit the file called "myswitch.yaml". In myswitch.yaml you define the commands to switch your RGB LED light. Additionally you can define a command to get the current state.
#myswitch.yaml
# RESTful Switch integration

  - platform: rest
    name: office_led_strip
    unique_id: office_led_strip
    resource: http://172.18.67.79/rest
    body_on: '{"r": {{ states("input_number.office_led_strip_r") }}, "g": {{ states("input_number.office_led_strip_g") }}, "b": {{ states("input_number.office_led_strip_b") }}, "brightness": {{ states("input_number.office_led_strip_brightness")}} }'
    body_off: '{"r": 0, "g": 0, "b": 0, "brightness": 0}'
    is_on_template: "{{ value_json.on }}"
    headers:
      Content-Type: application/json
- - platform
- rest indicates to use the RESTful integration
- name
- you can give your switch a name
- unique_id
- a unique identifer for your switch
- resource
- a REST endpoint on your device. In the example "http://172.18.67.79/rest"
- body_on
- is the JSON to switch the output on. For example {"r": 255, "g":255, "b":255, "brightness": 255} will switch on the RGB LED.
- body_off
- similar to previous entry, this command will switch off the RGB strip.
- is_on_template
- This template will be used to get the state of the RGB LEDs. In my example the endpoint answers with either {"on": false} or {"on": true}
HA: mytemplate.yaml Template for Light integration
The template section lights creates lights and provides the ability to run scripts to switch on/off, change the brightness and set the color of a light. In our example the values for RGB and brightness are stored to the created input number helpers.
#mytemplate.yaml
#template:
- light:
  - turn_off:
    - target:
        entity_id:
        - switch.office_led_strip
      action: switch.turn_off
    turn_on:
    - target:
        entity_id:
        - switch.office_led_strip
      action: switch.turn_on
    set_level:
    - data:
        value: '{{ brightness }}'
        entity_id: input_number.office_led_strip_brightness
      action: input_number.set_value
    - data_template:
        entity_id: switch.office_led_strip
      action: switch.turn_on
    set_rgb:
    - data:
        value: '{{ r }}'
        entity_id: input_number.office_led_strip_r
      action: input_number.set_value
    - data:
        value: '{{ g }}'
        entity_id: input_number.office_led_strip_g
      action: input_number.set_value
    - data:
        value: '{{ b }}'
        entity_id: input_number.office_led_strip_b
      action: input_number.set_value
    - data_template:
        entity_id:
        - switch.office_led_strip
      action: switch.turn_on
    default_entity_id: light.office_led_strip
    name: Office LED Strip
    rgb: ({{ states('input_number.office_led_strip_r') | int}}, {{ states('input_number.office_led_strip_g')
      | int}}, {{ states('input_number.office_led_strip_b') | int}} )
    state: '{{ states(''switch.office_led_strip'') == ''on'' }}'
Restart HA Configuration
When you have modified (added) a platform in the configuration.yaml you must
RESTART your configuration. Usually this is only needed once. Use
Developer tools / Check and Restart / Restart

Later, when you just do adoptions in the myswitch.yaml or mytemplate.yaml it is sufficent if you just do a YAML configuration reloading (see next chapter).
Check Configuration
After you have changed files you can do a quick check of your files in Developer Tools / YAML / CHECK CONFIGURATION.
Reload YAML configuration
You will find it in the Developer tools also:
Developer tools / YAML configuration reloading / All YAML configuration

HA: Add Light to Dashboard
Now you can add a new card by entity. Chose your entity (use the light - not the switch!) and press CONTINUE
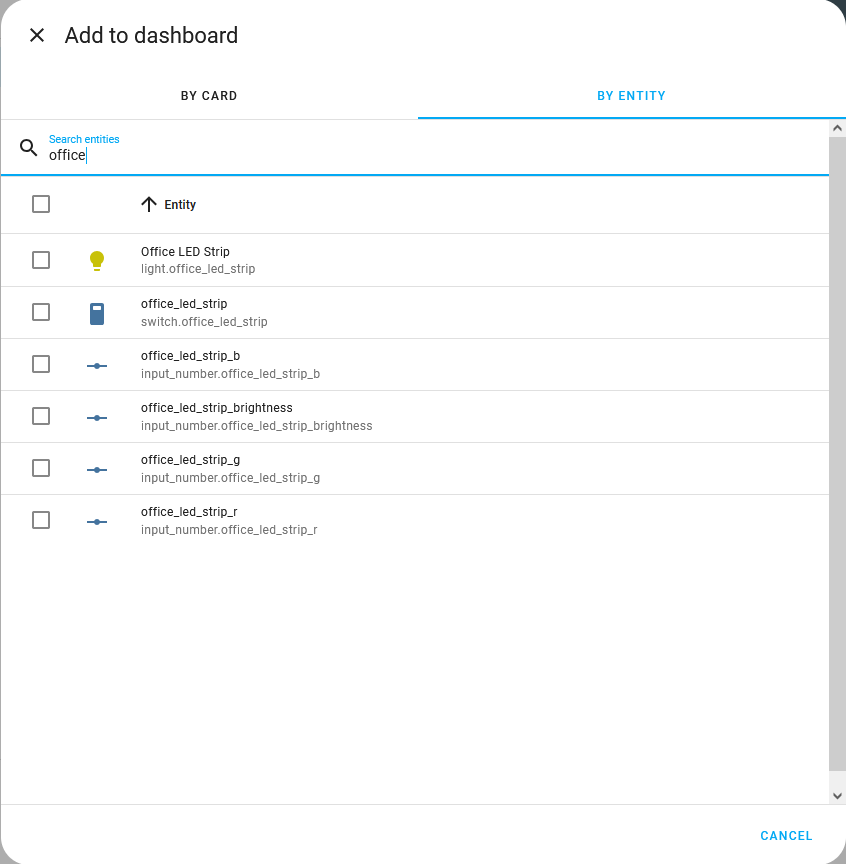
Home Assistant will notify "We created a suggestion for your" and leave the card with ADD TO DASHBOARD
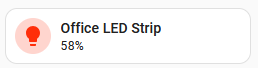
In your dashboard you can use your Arduino / ESP based RGB light. The slider will control the brightness:
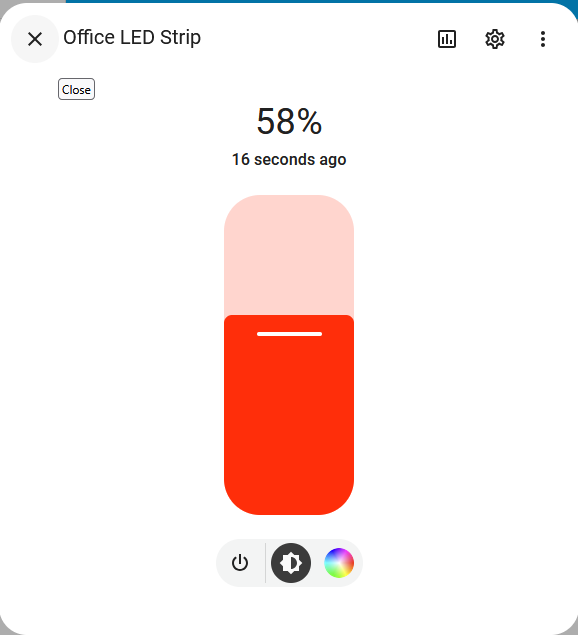
The on/off Button will toggle the RGB light:

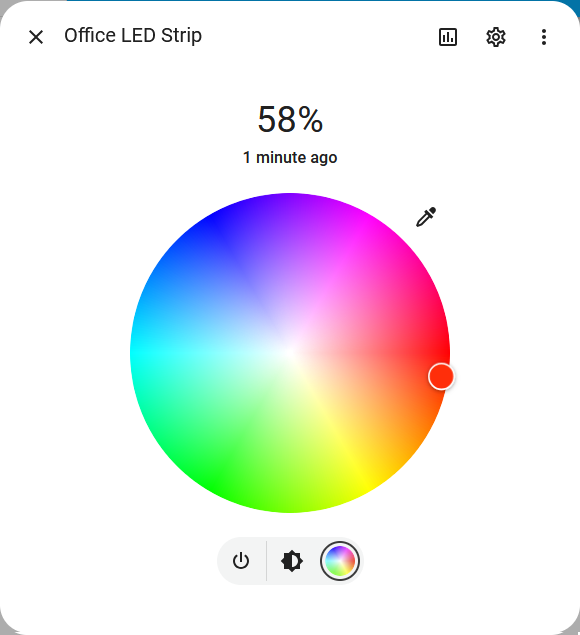
Using the color picker you can change the RGB values of your device:
Remarks for HA:
- The LIGHT toggle sends the defined defined on/off commands to the
SWITCH.
The SWITCH sends the JSON template for body_on or body_off. Therefore the SWITCH must provide the correct on/off state - otherwise this on/off toggle can't work. - The brightness slider reaches 0 - 100% on the GUI, but will store a value of 0 ..255 to the helper variable and in the following to the SWITCH.
- The RGB color picker will set the helper variables for red/green/blue also in a rage of 0 .. 255.
- To be able to calculate the final PWM output in your device the SWITCH has to send the red/green/blue values AND the brightness. In my usecase it was necessary to send the RGB values in combination with the brightness as my device doesn't store internally the brightness.
The Arduino / ESP Sketch
As mentioned in the beginning I'm using a H801 Wifi LED Controller. It offers up to 5 PWM channels, but you can use any microcontroller with a web interface.
You will need a REST endpoint on your device. This means you will need to parse the incoming JSON. As response to the requestor (HA) send a JSON with the state of the RGB lights. On an ESP8266/ESP32 I recommend to use the ArduinoJSON library. Working with a simple command_line integration will not make it easier.
This an example payload to switch on the first 3 colors and full brightness
{"r": 255, "g":255, "b":255, "brightness": 255}
as Minimum the device must respond with a status of the PWM pins used for RGB. In my example sketch on is set to true when any of the PWM outputs is >= 1
{"on": true}
In contrast when all RGB channels are 0 the sketch response is
{"on": false}
The Arduino sketch can be downloaded from this site. See the linked pages.
Summary
The integration of an RGB light needs some effort, but as you see, you can integrate your own Arduino/ESP based RGB LED controller into Home Assistant.