Arduino and HAM: YAESU HAM Antenna Switch - Linear Jack Version
In the following I describe a revised HAM antenna switch that can be connected via the Linear Jack to YAESU HAM radios. The YAESU HAM antenna switch ensures that an appropriate antenna is connected to the radio depending on the selected frequency on the rig. There is no manual switching necessary - all switching is done by the microcontroller in the background, but can be overwritten any time.
Preamble
Most of the implementation work was done for Intelligent Antenna Switch for the ICOM CI-V. After a stable operation for over two year, the OM decided to switch to a YAESU FTDX101MP. As the YAESU RS232 interface was already occupied by an external amplifier the remaining option to read the band information from the was the YAESU Linear Jack.
Operation and Program Logic of the Antenna Switch for the YAESU Linear Jack
For the main program functionalities and options, please see the start page of the Intelligent Arduino Antenna Switch. There are some specifics when reading from the YAESU Linear Jack:
- The ICOM FTDX101MP uses a D-Sub15 jack to provide 4 data pins. Each of the bit pattern represent one band.
- 40m and 60m share the same bitcode, therefore you can't assign different antennas for these two bands. However you can always switch between antennas with the up/down keys on the antenna switch.
- The 4 pins on the YAESU Linear Jack are readed and translated in a pseudo frequency (QRG). This QRG is used to lookup the band table.
Just as remark: On some resources the YAESU bitcode from the 4 pins are sometimes referred as to be "BCD" (Binary Encoded Decimal). But this is not correct as there are several bitcodes in decimal 10 (and higher) and that wouldn't be possible in BCD. Therefore I call this YAESU bit pattern "bitcode".
Display Example
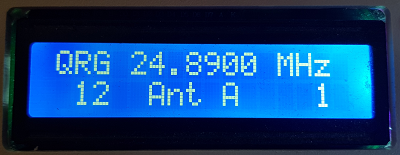
Example: LCD display: The radio is set to a frequency of 25.000, the intelligent antenna selector automatically switches to the antenna A as it was saved for band 12 previously:

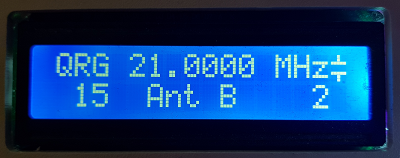
When the frequency changes to 21.250 a different band is recognized and the stored antenna B will be activated:

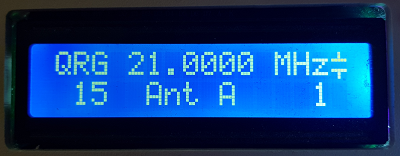
Another antenna can be activated with the [UP] or [DOWN] button

After a short delay, the assignment of antenna A to band 15 will be stored to the EEPROM.
Program Configuration for the YAESU Linear Jack
The program can be configured for several different input variants. To use the YAESU Linear Jack do following:
In the main tab around row 92 you have to activate the configuration file with your program settings. The file configYlinear.h is a working example for the YAESU Linear Jack:
#include "configYlinear.h"
In that tab you can configure the polarity of your relays, the LCD I2C address and assign the pins.
To read the binary code from the YAESU Linear Jack you must define 4 free pins. Put the 4 pins in the Array linearPin[]. If you run out of "digital" pins, you can use "analog pins" also:
//                   data pin   A   B   C   D   // the binary codes are represented in MSB order: DCBA
constexpr uint8_t linearPin[] {10, 12, 13, A2}; // the 4 data pins to read the binary information on the YAESU Linear Jack
Just in case why you wonder why I use 13 and the "Analog" pin A2: These were the 4 last available pins on an Arduino UNO to keep the rest of the pins somehow compatible to older versions.
Notes about the Linear Jack on the YAESU FTDX101MP
The ICOM FTDX101MP uses a D-Sub15 female jack to provide the 4 data pins. I'm
using following pins:
| YAESU Linear Jack (D-SUB15) |
Usage | Arduino |
|---|---|---|
| 4 | Data A | 10 |
| 5 | Data B | 12 |
| 6 | Data C | 13 |
| 7 | Data D | A2 |
| 15 | GND | GND |
Please check the pinout with the manual of your YAESU HAM Radio. Not all YAESU radios are using a 15 pin connector.
Each of the bit pattern represent one band. 40m and 60m share the same bitcode, therefore you can't assign different antennas for these two bands.
I recommend to used pulldown resistors (10K) for each data line to give each input pin a defined level to avoid unexpected behaviour of the relays in case the connector gets disconnected.
Summary
Using the YAESU Linear Jack to optain the band information enables you to switch antennas based on the QRG of your HAM radio.
