Update of Webpage with Fetch API

A short example how to update an Arduino Webpage with the fetch API.
On this page I want to show, how to update content of a webpage without reload of whole page. You could add a meta tag "refresh" into your page, but there is a better variant: the fetch API.
To make the fetch API working you will need three components:
- a HTML file/resource wherein you have placeholders marked with id= to make them accessible from a JavaScript
- a resource ("file") on your webserver which outputs the updated data only
- a JavaScript using the fetch API to get new data from the Arduino periodically (more or less a GET request to your Arduino) and fill in the data into the right places
At the end of this page, you can download the working example.
Before we start:
If you haven't read my post about the Arduino UNO webserver. It explains how to improve the IDE example and serves as base for this page. Additionally I recommend to read how to optimze SRAM, Progmem and Speed on the webserver. I will use the StreamLib for the webserver. You can install the StreamLib from the Arduino Library Manager.
A HTML file/resource
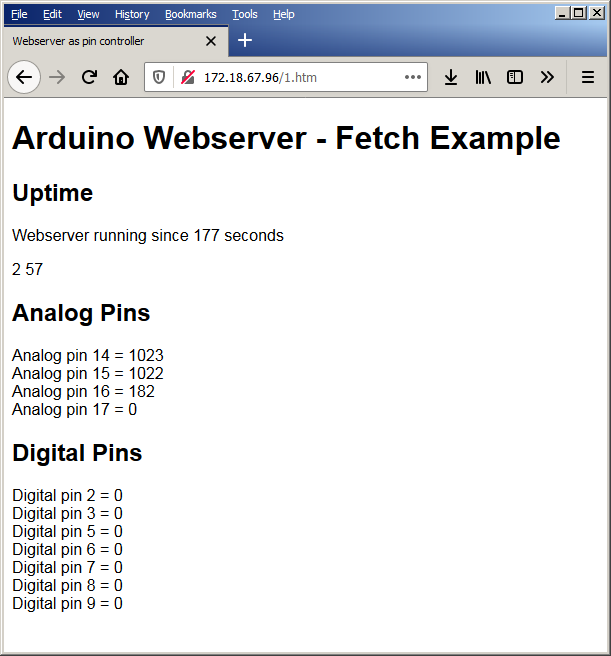
First we will write a simple webpage "1.htm". There will be just a simple output of the timestamp (millis()/1000) and the reading of some digitalPins and analog pins.
Additionally I add the actual reading to the output. That's no mandatory, as you will update these values later on by the fetch API, but I prefer to have a simple webpage working even without JavaScript. The basic design is very simple, just keep in mind, that I'm using the StreamLib Library:
void sendPage1(BufferedPrint &message)
{
// Serial.println("[server] 200 response send");
message.print (F("HTTP/1.0 200 OK\r\n"
"Content-Type: text/html\r\n"
"\r\n" // a blank line to split HTTP header and HTTP body
"<!doctype html>\n" // the HTTP page itself
"<html lang='en'>\n"
"<head>\n"
"<meta charset='utf-8'>\n"
"<meta name='viewport' content='width=device-width'>\n"
"<script src='/1.js'></script>\n"
"<title>Webserver as pin controller</title>\n"
"</head>\n"
"<body style='font-family:Helvetica, sans-serif'>\n" // a minimum style to avoid serifs
"<main>\n"
"<h1>Arduino Webserver - Fetch Example</h1>\n"));

message.print(F("<h2>Uptime</h2>\n"
"<p>Webserver running since <span id='ss'>"));
message.print(millis() / 1000);
message.print(F("</span> seconds</p>\n"));
message.print(F("<p><span id='hour'></span> <span id='min'></span> <span id='sec'></span></p>\n"));

message.print(F("<h2>Analog Pins</h2>\n"));
message.print(F("<p>"));
for (size_t i; i < sizeof(analogPin); i++)
{
message.print(F("Analog pin "));
message.print(analogPin[i]);
message.print(F(" = <span id='analog"));
message.print(i);
message.print(F("'>"));
message.print(analogRead(analogPin[i]));
message.print(F("</span><br>\n"));
}
message.print (F("</p>\n"));

message.print(F("<h2>Digital Pins</h2>\n"));
message.print(F("<p>"));
for (size_t i; i < sizeof(ledPin); i++)
{
message.print(F("Digital pin "));
message.print(ledPin[i]);
message.print(F(" = <span id='digital"));
message.print(i);
message.print(F("'>"));
message.print(digitalRead(ledPin[i]));
message.print(F("</span><br>\n"));
}
message.print (F("</p>\n"));

message.print (F("</main>\n"
"</body>\n"
"</html>"));
message.flush();
}
The important part is, that each dynamic value is enclosed in a <span> tag and has its own unique id. This will be the key for the JavaScript to update that value.
The Data File in JSON Format
You could transfer data in a simple CSV format, but I prefer a JSON for several reasons:
- JSON produces less overhead than a XML
- it can be parsed very easily by the JavaScript
- JSON describes the data and is human readable also.
For further developments, it is very easy to add more fields, re-order them or to delete fields without breaking the JavaScript. The example will just output a timestamp (millis()/1000), the state of the digital pins, and the readings from the analog inputs.
{"ss":1017,
"digital0":0,"digital1":0,"digital2":0,"digital3":0,"digital4":0,"digital5":0,"digital6":0,
"analog0":1021,"analog1":1022,"analog2":178,"analog3":0}
You can use the ArduinoJSON library, but for such a simple JSON I just write some lines of code. You see I try to keep the data consistent to the <span> id's in the HTML.
void sendJson(BufferedPrint &message)
//void getJson(EthernetClient &client)
// send the data as JSON to the web browser
{
  message.print(F("HTTP/1.0 200\r\n"
                  "Content-Type: application/json\r\n"
                  "\r\n"
                  "{\"ss\":"));
  message.print(millis() / 1000);   // timestamp in seconds

  for (size_t i = 0; i < sizeof(ledPin); i++)
  {
    message.print(F(",\"digital"));
    message.print(i);
    message.print(F("\":"));
    message.print(digitalRead(ledPin[i]));
  }

  for (size_t i = 0; i < sizeof(analogPin); i++)
  {
    message.print(F(",\"analog"));
    message.print(i);
    message.print(F("\":"));
    message.print(analogRead(analogPin[i]));
  }
  message.println(F("}"));
  message.flush();
}
The JavaScript - Fetch API
Finally you will need a JavaScript which fetches the data from the Arduino and updates the received data fields.
void sendJs(BufferedPrint &message)
{
  message.print(F("HTTP/1.0 200\r\n"
                  "Content-Type: application/javascript\r\n"
                  "\r\n"));
  message.print(F("const url ='1.json';\n"
                  "function renew(){\n"
                  " document.getElementById('ss').style.color = 'blue'\n"
                  " fetch(url)\n" // Call the fetch function passing the url of the API as a parameter
                  " .then(response => {return response.json();})\n"
                  " .then(jo => {\n"
                  "   document.getElementById('sec').innerHTML = Math.floor(jo['ss'] % 60); \n"
                  "   for (var i in jo)\n"
                  "    {if (document.getElementById(i)) document.getElementById(i).innerHTML = jo[i];}\n"
                  // add other fields here (e.g. the delivered JSON name doesn't fit to the html id
                  // finally, update the runtime
                  "   if (jo['ss'] > 60) { document.getElementById('min').innerHTML = Math.floor(jo['ss'] / 60 % 60);}\n"
                  "   if (jo['ss'] > 3600) {document.getElementById('hour').innerHTML = Math.floor(jo['ss'] / 3600 % 24);}\n"
                  "   if (jo['ss'] > 86400) {document.getElementById('day').innerHTML = Math.floor(jo['ss'] / 86400 % 7);}\n"
                  "   if (jo['ss'] > 604800) {document.getElementById('week').innerHTML = Math.floor(jo['ss'] / 604800 % 52);}\n"
                  "   document.getElementById('ss').style.color = 'black';\n"
                  " })\n"
                  " .catch(function() {\n"
                  "  document.getElementById('ss').style.color = 'red';\n"
                  " });\n"
                  "}\n"
                  "document.addEventListener('DOMContentLoaded', renew, setInterval(renew, "));
  message.print(F("5000"));  // the update interval in milliseconds
  message.print(F("));"));
  message.flush();
}
The JavaScript will call the data by a request to the resource const url ='1.json'. On receive there are two possibilites:
- data which matches exactly the span ID will be replaced by a two liner. Just iterate through all received fields and try to find them in the HTML. On success - replace the content (innerHTML). It doesn't matter if you transmit one field or 20. If the ID matches - it will be replaced.
- Sometimes you want calculate data. The timestamp ss will be converted in seconds, minutes, hours, (..:) and afterwards inserted in the respective places.
Additionally you will see a short color change of the timestamp ss. When the fetch API gets data, the timestamp will change to blue. If the script fails (for example because of an syntax error), the timestamp will remain red. If the update was successfull, the color will be changed back to black.
The document will call the fetch API every 5000 milliseconds, meaning the values will be refreshed every 5 seconds.
Working Example
At the end fo the page you will find a working example sketch as proof of concept. Set a free IP address and upload the Sketch to your Arduino. You can access a simple webserver with the IP. The Fetch example can be accessed by
http://[yourIp]/1.htm
Summary
You have learned how to update a webpage without a manual reload.